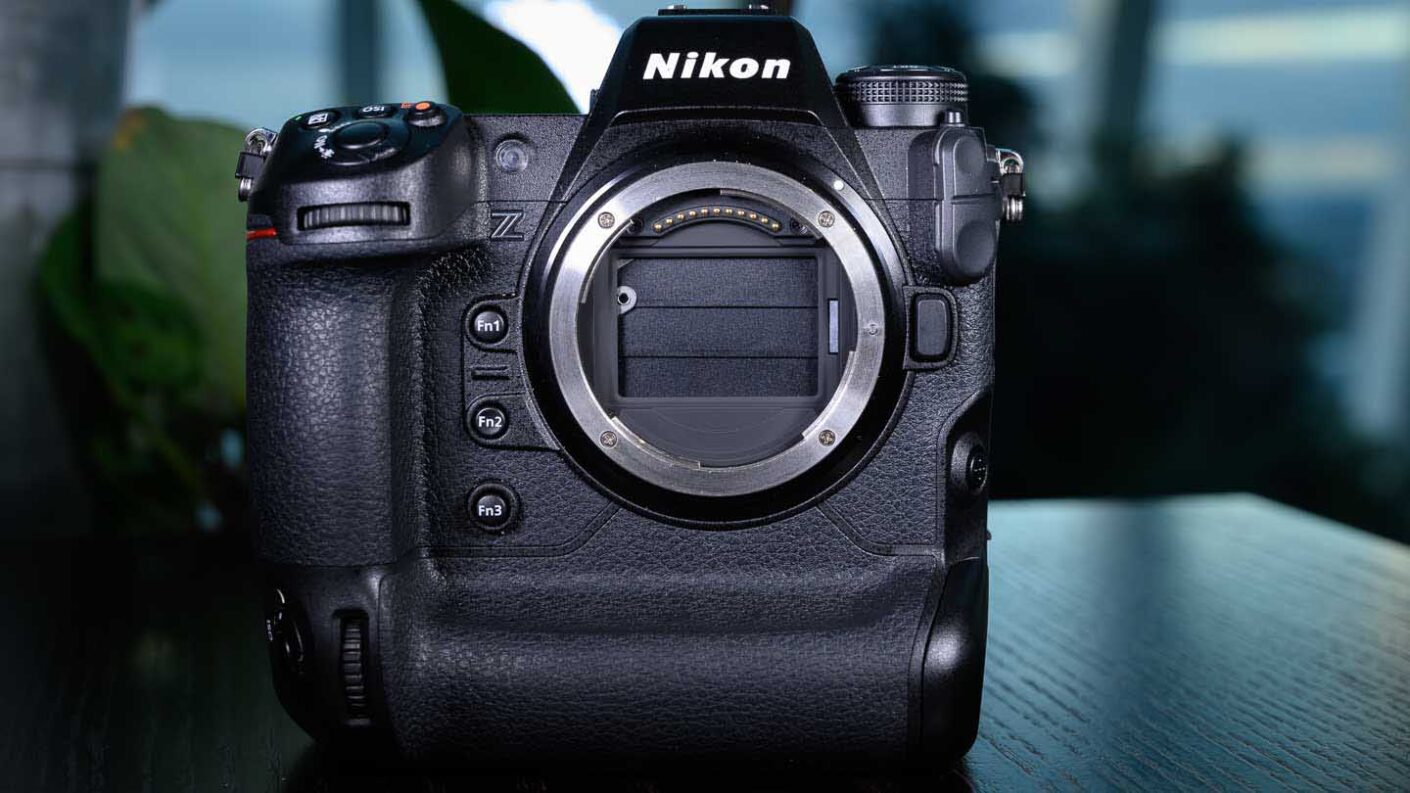
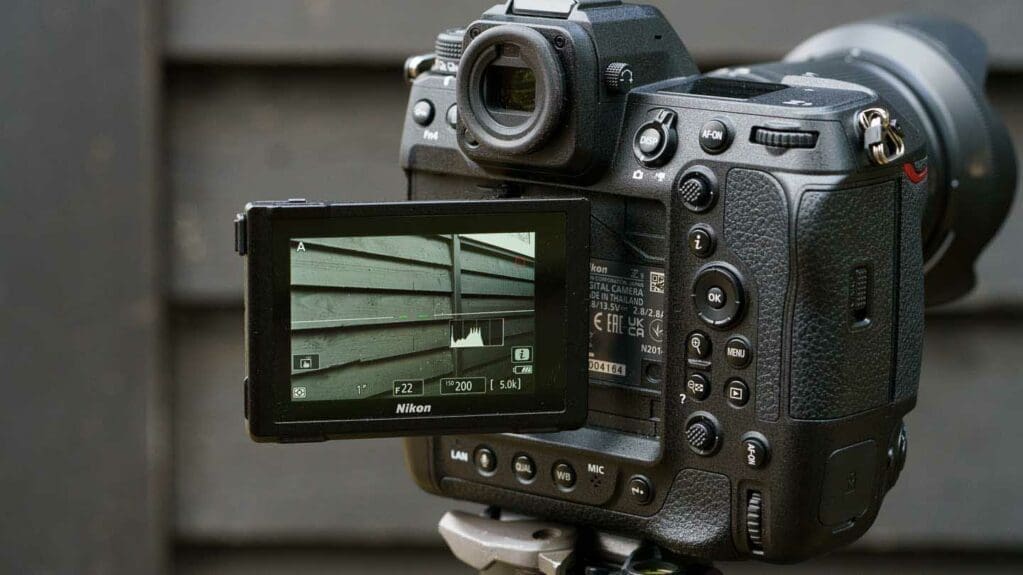
While it feels robust and has two comfortable, deep grips, the Nikon Z9 is 20% smaller than the Nikon D6, the company’s current flagship DSLR. It’s made from magnesium alloy and has extensive weather-sealing.
At 1160g body-only, it’s also 70g lighter than the D6 (110g lighter if the battery and memory card are in place), but there’s no getting away from it, it’s a big heavy camera. Interestingly, ‘is it heavy’ is the question I’ve been asked most about the Z9.
Having used the Nikon Z6 II, Z7 II, Z6 and Z7 in heavy rain, I’d have no qualms about shooting with the Z9 in bad weather. It’s built to last in the hands of professional photographers who need to shoot in all manner of conditions, including at temperatures down to -10°C.
Having used the Nikon Z6 II, Z7 II, Z6 and Z7 in heavy rain, I’d have no qualms about shooting with the Z9 in bad weather, it’s built to last in the hands of professional photographers who need to shoot in all manner of conditions, including at temperatures down to -10°C.
Nikon has given the Z9 a sensor shield, which looks like a shutter, but that is designed to protect the sensor when lens lens or body cap is removed. There’s also a conductive coating that creates a magnetic field to repel dust from the imaging sensor.
Screen and viewfinder
On the back of the Z9 there’s a 3.2-inch 2,100,000-dot screen that can be tilted in four directions to enable it to be helpful when composing portrait or landscape orientation images from above or below head height.
When vari-angle screens seemed like the only alternative to tilting screens, I preferred them, but a dual-tilting mechanism gets my vote. It means that the screen can be moved to give a clear view whatever orientation you’re shooting in without swinging to the side and getting in the way of any of the ports or connected cables. Crucially, in the case of the Nikon Z9, the mechanism also feels durable and the screen gives a clear, detailed view.
As usual now, the screen is touch-sensitive. It’s also possible to select the main and i-menus options with a tap or using the physical controls, making the camera that bit quicker and more intuitive to use.
Helpfully, the information screen can rotate when the camera is in portrait orientation. Occasionally, this happens when you move the camera and you’re not planning to shoot in upright orientation, so there may be times when you want to turn off this functionality.
Indoors, the screen provide a very crips, clear view with plenty of detail visible. Outdoors, the screen also works well, but as usual, the viewfinder is preferable in bright sunlight.
Naturally, the Z9 also has an electronic viewfinder and according to Nikon, at 3000-nits, it’s the brightest of any current full-frame mirrorless camera, which should prove helpful in very bright ambient light. Also, because the Z9 has dual-stream technology which transfers data from the sensor to the viewfinder and for storage simultaneously, the viewfinder is black-out free and there’s a continuous real-time view so even fleeting moments aren’t missed.
As I raised the camera to my eye when shooting a rugby match, I sometimes noticed that the viewfinder image was a little jerky, but as soon as I half-pressed the shutter button, it came to life properly, delivering a wonderfully smooth, natural viewing experience.
Control arrangement
Unlike Nikon’s earlier Z-series mirrorless cameras, the Z9 is a dual grip camera which means you get the same solid hold whether you’re shooting in portrait or landscape orientation. The front and rear command dials, shutter button, power switch, AF-On, i-menu and joystick controls are also replicated so that there’s a set dedicated for use with each grip. This makes switching between the two shooting orientations almost seamless.
Unsurprisingly, the record button that’s near the landscape-orientation shutter release isn’t replicated on the top of the vertical grip.
All three of the buttons around the shutter release on the horizontal/landscape grip have a slightly different profile but I’d like the difference between the feel of ISO and exposure compensation buttons to be a little more marked. You get used to their location after a while, but a bobble on one of them would make them slightly easier to tell apart.
There are three function (Fn) buttons on the front of the camera between the horizontal mode grip and the lens mount that can be customised to give access to three of the features you use most often. I found these within easy reach of my fingers when they’re around the grip and they’re spaced far enough apart to make it easy to distinguish between them.
On the other side of the camera, alongside the HDMI and USB ports, there’s a button with a stippled texture that makes it look a bit like a joystick. This is the AF-Mode button and it works in combination with the command dials to enable the focus mode to be changed without having to remove the camera from your eye. We’ve seen a similar button before on some of Nikon’s DSLRs and its a great addition to the Z9.
Unlike the Z7 II and Z6 II, which have an exposure mode dial, the Z9 has a mode button that must be pressed while a command dial is rotated to set the exposure mode. This button is grouped with buttons to access the continuous shooting, bracketing and flash mode options. Underneath it, there’s a switch for setting the drive mode.
While a continuous shooting rate of 20fps is more than enough for many shooting situations, the Nikon Z9 can shoot at 30fps or 120fps, but it’s not immediately obvious how to select these options. Perhaps in recognition that the file format switches automatically to Normal-quality Jpeg when the camera is set to shoot at 30fps or 120fps, Nikon has put these options in a different area. Instead of selecting H on the drive mode dial, you need to select C – the customisable option. Then, while pressing the drive button on the far left end of the top-plate of the camera, rotating the rear command dial takes you through the available options, including C30 and C120.

